Have you ever wondered whether you’re looking at a star, planet, or alien spaceship? Well, it’s probably NOT the last one, but it can be difficult to tell the difference between stars and planets in the sky with the naked eye.
According to a study by Science Advances, researchers found that only a third of the population can see the milky way. The amount of light pollution now prevents many of us from seeing all the detail in the sky above us, but there are plenty of ways to counteract this. In today’s article we’ll talk about how to get into astronomy and see all the natural beauty right above our heads.
Stargazing is a great hobby to get into that’s affordable and endlessly entertaining. Whether you’re heading out to see astrological events like an eclipse, a meteor shower, aurora borealis (northern lights), a comet, or even just observing the constellations—the night sky is absolutely mesmerizing. Let’s learn how you can start observing objects in the sky using just your eyes or a simple, inexpensive pair of binoculars.
How to Start Stargazing in 2021: A Beginner’s Guide
Find the Best Location to Stargaze in Your Area by Using a Dark Sky Map
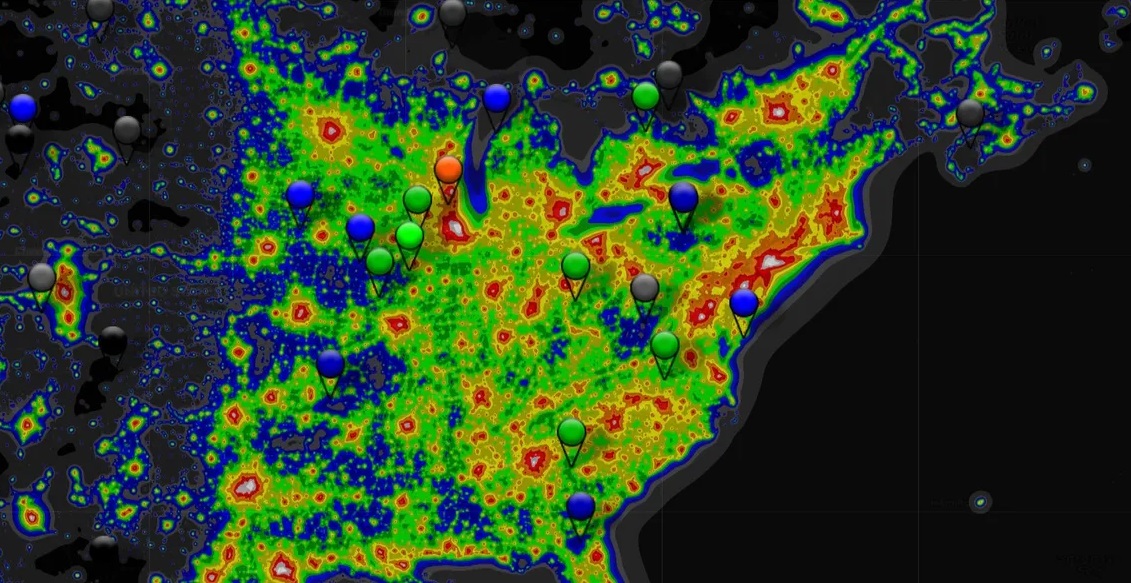
It should come as no surprise that the best stargazing is done outside of populated areas where light pollution washes out the night sky. For most of us to get to an area with low light pollution means going for a 2-3 hour drive. But before you head out, be sure to take a look at an online dark sky map. A dark sky map will show you the light pollution levels in your part of the world and help you identify areas where you can see the sky clearly. There are lots of resources to help you plan where to go to stargaze such as the websites Dark Sky Map or Dark Site Finder. You can also try searching “dark sky map” in your region on Google to find maps specific to your city or country.
How Long Does it Take Your Eyes to Fully See the Night Sky?
Before you get going, there are a few things to know about the night sky. For one, your eyes take about 20-45 minutes to adjust to the night sky. Once you turn off your car headlights, you’ll need this much time for your eyes to adapt before you can see all the details of the night sky, including the faintest stars and features. Here are some other things to know before you head out on a late-night adventure.
Consider Weather Conditions
While many people think about light pollution as a factor and will leave the city to get away from streetlights, the weather is also an important factor in your sky observation. The best conditions are on a night without a full moon and no clouds. Obviously, you can still see stars on a full moon, but if you can plan ahead you can significantly enhance your night adventure.
Lookup Astrological Events
While the stars are always there, some things only happen at certain times of the year. That said, many astrological events happen a lot more often than you might think. For example, there are about 30 meteor showers that happen throughout the year.
The Perseid Meteor Shower is a showstopper and we highly recommend checking it out. It occurs every summer and usually peaks around mid-August. You can see as many as 120 meteors per hour, if you’re lucky, but the number of meteors varies from year to year.
Fun fact: The Perseid Meteor Shower is named after the constellation Perseus since that’s where the meteors radiate from. However, it also relates to the Greek myth that Zeus visited Danaë, Perseus’ mother, and showered her with gold (or in this case meteors!)
Other events that occur less often are lunar eclipses, solar eclipses, and comets. These events are widely covered by the media so you’ll know about them well ahead of time. Still, it’s a good idea to look up events happening throughout the year to see if any coincide with when you’re planning to go out.
What to Bring Stargazing
While it’s tempting to drive out to the country, toss down a couple blankets, and just stare at the sky, there are a few key items you can bring to improve your experience. Here’s what we recommend you carry along:
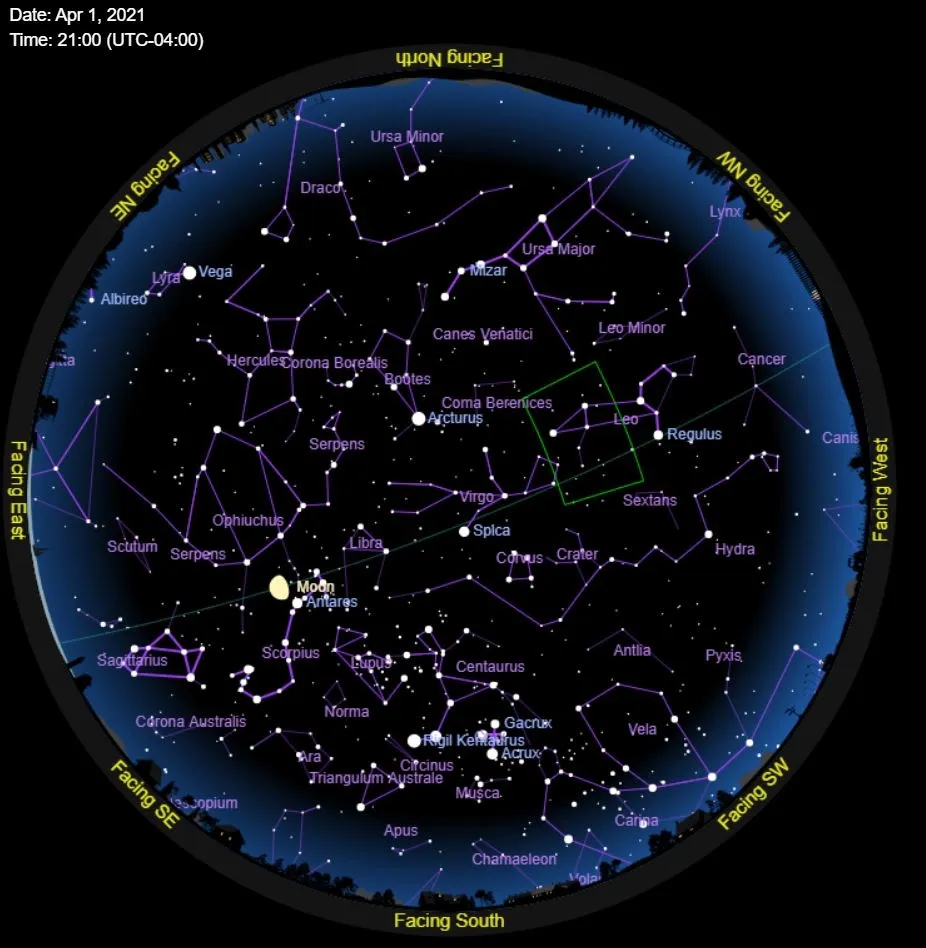
A Star Chart
The sky is infinitely more interesting when you can identify the patterns above you that humans labeled thousands of years ago. One thing you can bring with you is a star chart, also called a planisphere in astronomy. This will help you to recognize the different stars and constellations. You can download one for free here [at the bottom of the page] from the Sky & Telescope magazine.
One limitation with star charts is that they don’t show you the planets or moon as they are always moving. For a more detailed map, you can download a free app on your phone like Sky Guide for iOS or Star Walk for Android. These night sky maps are super handy because all you have to do is hold your phone up to see exactly what stars are in front of you. Plus, they even have artwork overlayed on the pattern to bring the constellations to life as well as explanations of what you are looking at.
The only catch is that your phone emanates blue light which disrupts your eyes, so we suggest using a red-light filter on your phone or putting it away once you’ve identified what you’re looking at.
Red LED Flashlight
Remember how we mentioned that it takes 20-45 minutes for your eyes to adjust to the dark? Because of that, many people will bring a red LED flashlight with them instead of a normal flashlight. That helps to prevent their eyes from being “bleached” and needing to readjust to low light conditions.
If you’re using a printed-out star chart, then you’ll still want to be able to read it and this kind of flashlight is best. If not, then make sure you have a flashlight with multiple settings so you can use it on the lowest settings.
Binoculars
While most people think they have to invest in a telescope to observe the planets and stars, this couldn’t be further for the truth. Using a pair of binoculars to observe the night sky is actually the perfect place to start for beginners. Binoculars cost a small fraction of a telescope, they are compact and require no time to set up. Plus, binoculars with just 7-10x magnification will bring out a shocking amount of details in the night sky. The difference between looking at the sky with the naked eye compared to looking up with binoculars is something you have to see to believe. We guarantee that you’ll be blown away the first time you use binoculars when gazing out on a starry night!
Telescope
If you’re really into stargazing, then a telescope is certainly the way to go. Many people get caught up looking for a big and expensive telescope to be able to see more details. However, large telescopes are not easily portable and unless you’re a die-hard space fanatic, you might not use it as much as you think.
While choosing a telescope is outside the scope of this article, we’re happy to refer you to this great guide on How to Choose a Telescope from the Sky & Telescope magazine.
Camera
All modern phones have a built-in camera and higher end phones even allow you to set a longer exposure time, which will enable you to take pictures of the night sky. There is however no substitute for a proper DSLR or Mirrorless camera so if you own one be sure to bring it along on your nighttime adventures. In the final section of this article we’ll share some tips to help you dip your toes in with astrophotography.
Getting Started in Astrophotography

Astrophotography will leave you breathless. There are lots of different ways to take captivating and creative photos of the night sky. While the sky looks still to us, the stars (or rather we) are always moving. Let’s take a look at a few tips that will help you get started with night sky photography.
Camera Settings
In order to capture images of the night sky with your DSLR or Mirrorless camera you’ll need to adjust several settings.
First, set your camera to capture images in the RAW format. This will allow you to adjust many settings like exposure, contrast and colours later in software like Photoshop.
Secondly, turn the brightness of your camera screen all the way down, so that it doesn’t interfere with your ability to see the details in the sky.
Next you’ll have to adjust the aperture, exposure time, ISO and white balance.
- Aperture: set your F-stop to the lowest valued allowed by your lens. A wide aperture will allow your camera to collect more light faster.
- Exposure time: start by setting your exposure length to about 15 seconds. This dictates the amount of time your camera absorbs light. If your pictures have star trails, lower the exposure time to the next setting and do this until each start is a single point of light.
- ISO: you’ll need to turn the ISO much higher than in daytime photography to capture the night sky. A good place to start is around 3200 ISO but this will largely depend on the quality of your camera. Keep in mind that the larger the ISO, the more grainy / noisy the pictures will turn out.
- White balance: set this to Daylight or 3300K
Once you have these settings dialed in, it’s time to set your focus. To do this, set your focus to manual control and turn the focus ring to infinity. Next, take a picture of the brightest star in the sky. Zoom on the star using your camera screen and if the start appears blurry, turn your focus ring 0.5mm away from infinity. Take a picture again and repeat this process until the start is perfectly sharp.
If you’re really interested in stepping up your game, try downloading the app PhotoPills. It’s a specialized app that will help you plan your nighttime photography and calculate the best exposure to use as well.
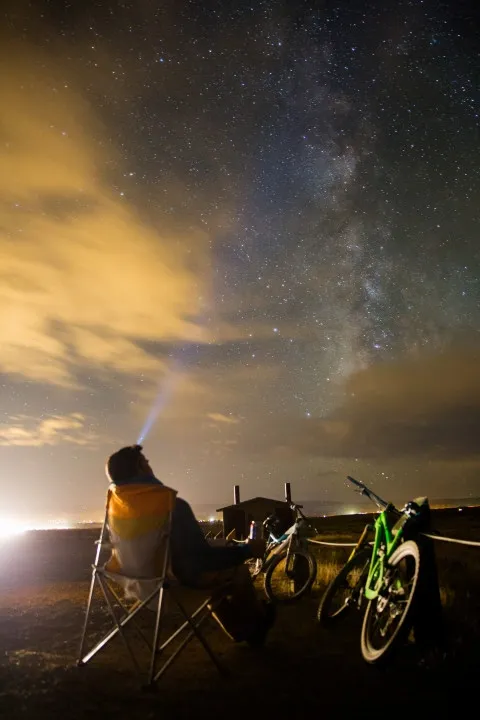
Compose Better Pictures by Adding an Interesting Foreground
In photography, foreground refers to the objects that are closer to the camera. In this case, everything is closer to your camera than the night sky. To compose a more interesting picture than just stars, try to capture parts of the environment in the foreground, along with the night sky in the background. Look around you and see what landscape elements will enhance your photography.
Try to include things like the silhouette of the treelines, the mountains, a car, or maybe even your friends!
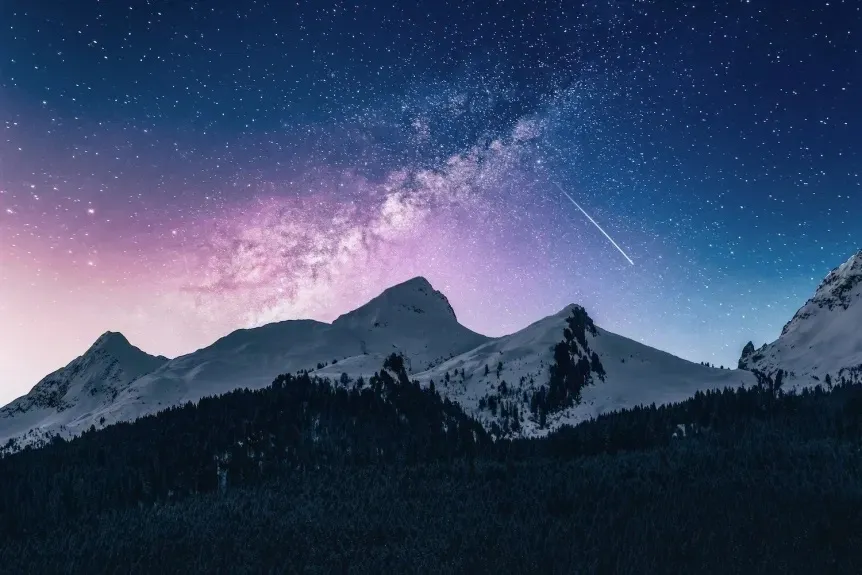
Above: Now that is a well composed astrophotography shot!
Image Processing
Many people think that you have to take the perfect photo in the moment, but with astrophotography you can actually bring out a lot of detail after the fact. As previously mentioned, you might edit the white balance after the fact. You can also try using tools in Photoshop to sharpen your image or increase saturation to get more colours.
For more tips on astrophotography check out this article from AstroBackyard.
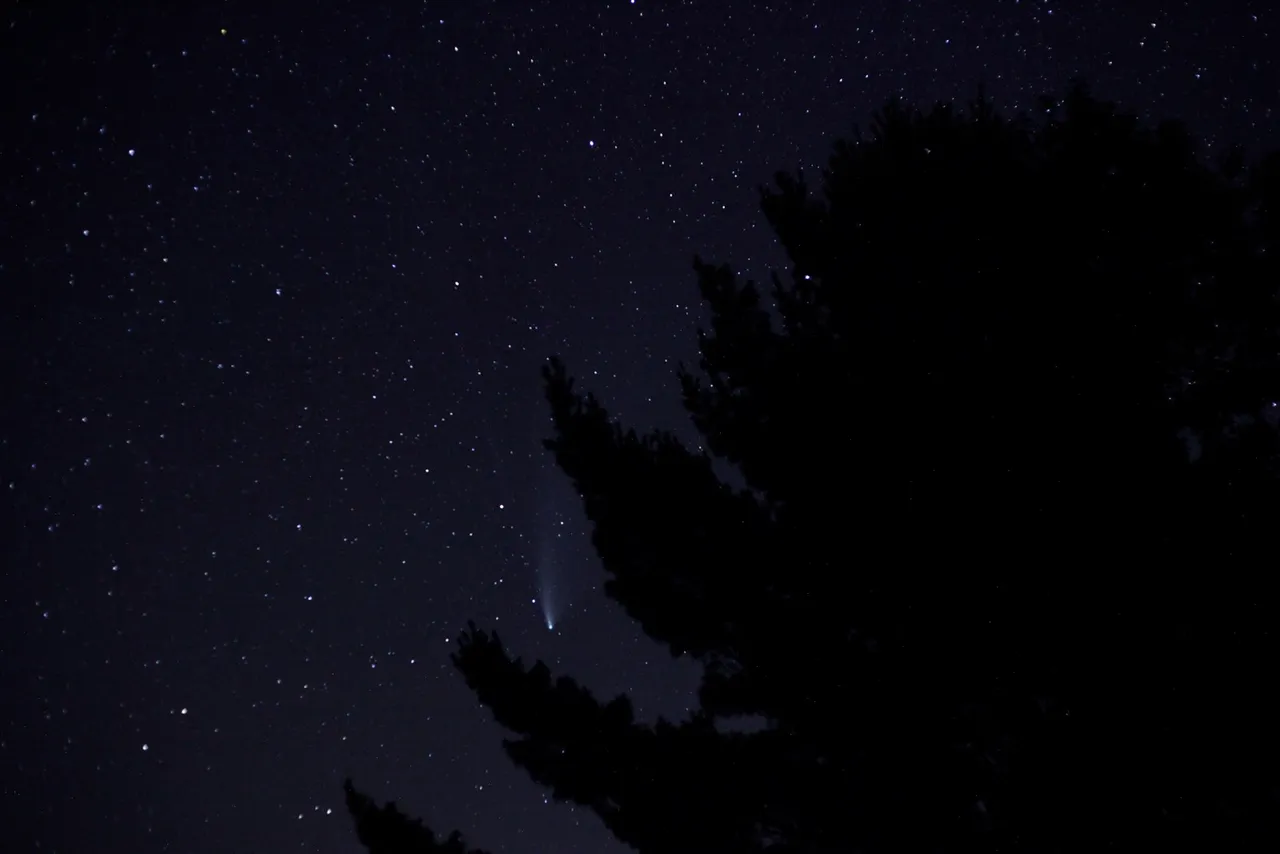
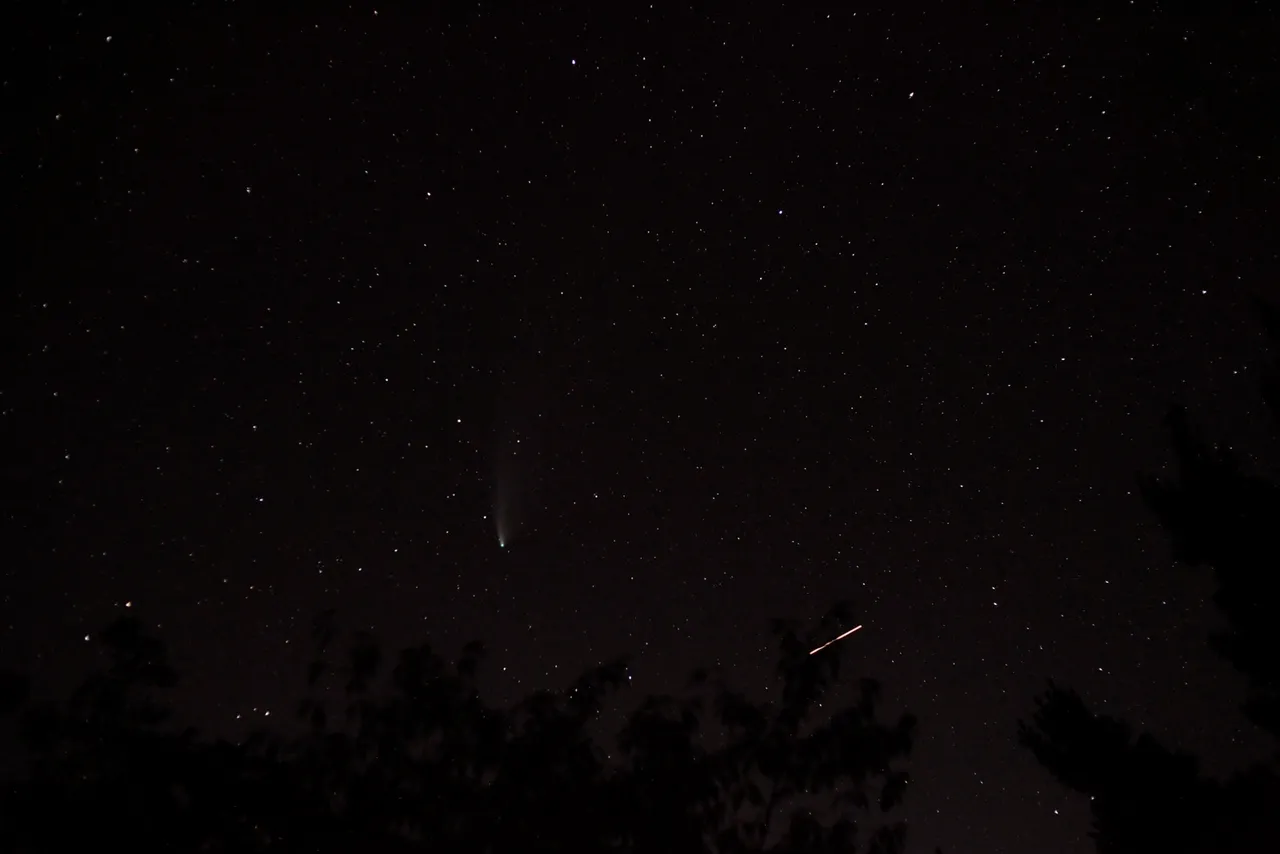
If you need some inspiration, here are a couple of rad photos taken by one of the team members at MGear when the Neowise Comet was visible in summer of 2020.
Above: Neowise comet [left of center] and the International Space Station [ISS; the streaking line]
Above: Neowise comet as seen through the branches of a pine tree.
We hope this article helps you get out and get exploring. Happy Adventuring!